这几天心血来潮在Github上建了个博客,纠结了半天才倒腾好,希望以后自己能多总结下学的知识,先从建立博客开始咯~
author: @Huji
1. 安装环境
Windows 10 64位系统
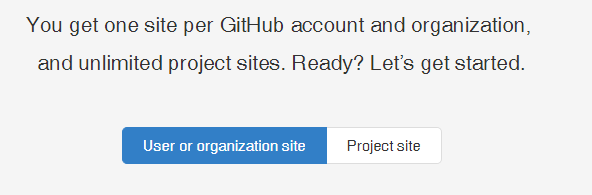
2. 创建自己的GitHub Pages
-
第一步:Create a repository,注意name必须和用户名一致如hujichn.github.io
-
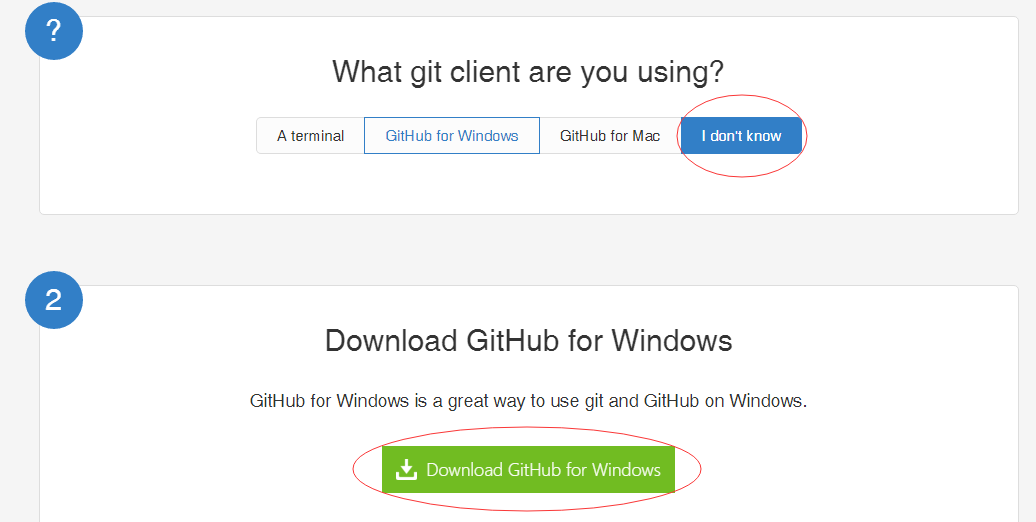
在What git client are you using?这一步,如果没有下载过
Github for Windows,可以选择I don't know,后面会出现下载链接,点击下载即可。这个下载的是在线安装包,可能会慢的感人,我后来找了一个离线安装包 [1],双击运行GitHub.application即可安装。
3. 安装Hexo
- 第一步是安装Node.js,根据自己的电脑选择合适的版本下载即可安装。 安装完成后添加Path环境变量,使npm命令生效。
|
|
安装完后在cmd中分别输入
|
|
如果都显示了版本号,那么就安装成功了。
- GitHub Windows安装好之后,桌面上应该有一个Git Shell,双击打开,输入以下命令换源,否则安装hexo速度感人。
|
|

然后再输入以下两行命令:
|
|
安装完成后,在GitHub默认路径下建立一个hexo的文件夹,如
C:\Users\Huji\Documents\GitHub\hexo。
在Git Shell中输入命令cd hexo切换到该文件夹下。再分别输入以下命令:
|
|
安装相关插件(复制以下命令,在Shell窗口里右键粘贴即可)
|
|
安装完成后,输入以下命令后,在浏览器中打开localhost:4000即可看到博客在本地的效果。在测试主题的一些效果的时候可以用这个命令在本地查看,等效果满意了再deploy到GitHub。
|
|
4. 利用Hexo写博客并将Hexo产生的静态网页部署到GitHub
- 更改博客的设置信息,在hexo文件夹下,打开
_config.yml文件,输入以下代码 [2],并进行相应修改。
|
|
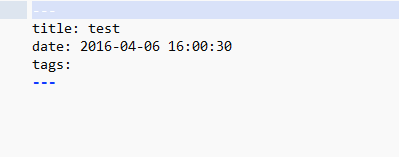
- 在Git Shell中切换到hexo目录,输入以下命令即可创建一篇名为test的新文章,会有一个test.md出现在
hexo\source\_posts这个目录中。
|
|
打开后看到默认会有title,date,tags等等信息,要写的文章内容可以在这个md中进行修改,可以先在后面随便打几个字作为正文。
- 接下来在Git Shell中输入以下命令,即可设置好身份信息
|
|
- 最终,使用以下命令即可将生成的网页部署到Github上。
|
|
访问http://userName.github.io就可以看到博客啦。
也可以使用下面的命令先在本地生成预览
|
|
在浏览器输入localhost:4000就可以看到本地生成的网页了,这样万一有问题可以改好了再提交到github上。
5. 更换主题,使用第三方插件增加评论,阅读次数统计等功能。
主题有很多好看的,这里选择了一个比较简单大方的Next主题。参考教程即可完成配置。
注意的地方:
-
教程中的
站点配置文件是指hexo目录下的_config.yml,主题配置文件是指hexo\themes\next目录下的_config.yml。 -
教程中设置头像时修改的应该是
主题配置文件,设置本地头像图片可以放在hexo\source\images\目录下,也可以放在\hexo\themes\next\source\uploads,要注意放置的位置要和配置相对应。 -
教程中设置第三方服务的全都应该填在
主题配置文件,这里面作者已经给写好了,只是都注释掉了,只要去掉注释,填写相应的内容即可。 -
阅读统计量功能里面,Next主题文件已经不需要修改,从
配置LeanCloud开始看即可。 -
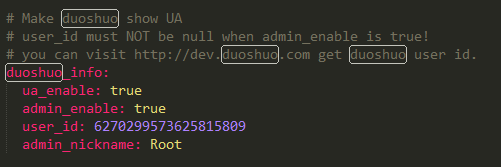
duoshuo评论功能打开之后,可以在
主题配置文件中打开UA开关,这样会评论旁边会显示User使用的电脑环境等信息。usr_id可以在多说的网站,通过点击自己的用户名得到。
- 设置头像翻转啊等一些动态效果:登录多说后台->设置,可以在自定义文本里面修改一些词语,在基本设置->自定义CSS中可以添加如下CSS代码 [3],实现后效果如图。

|
|
6. 新建about,categories页面以及插入外链图片或者视频
- 新建about, categories页面,在Git Shell中切换到hexo目录输入以下命令:
|
|
- 命令输入完之后,会生成categories文件夹,里面会有index.md的文件,打开文件,修改为:
|
|
- 在about页面可以插入图片,写文字等等,这里介绍下插入外链图片的方法。
- 首先,注册七牛网,注册好后要实名认证,然后就可以新建一个公开空间,点击内容管理,就可以上传文件并获得图片的外链了。
- markdown中插入图片的方法这里顺便一提:
|
|
- 插入视频通常是在视频网站选择嵌入,复制其提供的html代码,直接粘贴进博客的md文件中即可,因为markdown是支持html语法的~

7. 更新的相关操作
- 更新hexo:
|
|
- 更新主题: cd 到主题文件夹,执行命令:
|
|
- 更新插件:
|
|
8. 增加脚注功能footnotes
在Cmd Markdown里面写东西的时候是支持脚注的,但是Hexo默认的markdown渲染插件好像不支持,所以只好换了一个,步骤如下:
- 在hexo目录下输入
|
|
- 不过此时的hexo-renderer-markdown-it还是用不了脚注,我们需要加上plugin,这里写了一句footnote的安装,其他的也可以干脆一起装了,还可以支持emoji表情哦~~ 😄
|
|
- 装好之后编辑Hexo的配置文件
_config.yml,插入以下句子即可。
|
|
9. 数学公式后面有竖线的问题解决
这个问题在Issues里已经有人提出来,作者给出了解决方案,为了方便也在这里记录下:
- 首先,编辑next的主题配置文件
_config.yml,在里面找到mathjax的部分,替换为以下内容:
|
|
- 打开
\hexo\themes\next\layout\_scripts\third-party\mathjax.swig,将其内容替换为:
|
|
测试一下,应该可以啦~ $$\sum_{i=1}^n a_i=0$$
10. 迁移博客
最近换了电脑,需要迁移博客,把流程记录一下 我把源文件存在了github.xxx.io.git的hexo分支上,所以要先从这里clone 源文件
|
|
在本地新拷贝xxx.github.io文件夹下通过Git bash依次执行下列指令:npm install hexo、npm install、npm install hexo-deployer-git
在本地对博客进行修改(添加新博文、修改样式等等)后,通过下面的流程进行管理。
- 依次执行git add .、git commit -m “…”、git push origin hexo指令将改动推送到GitHub(此时当前分支应为hexo);
- 然后才执行hexo g -d发布网站到master分支上。
注意: 如果生成的页面为空可能需要看下theme文件夹里面的主题文件在不在 我用了如下指令重新clone了next主题
|
|